In this tutorial, we'll walk you through three different approaches to importing data into your CrateDB Cloud cluster.
The Import from URL and Import data from file methods are user-friendly options conveniently available in the Cloud Console. For those who prefer a more hands-on approach, the manual import via SQL statements in the Admin UI is also an option.
Import from URL
This is the most user-friendly method of all the options. To import data from a URL, navigate to the Data tab of your cluster:
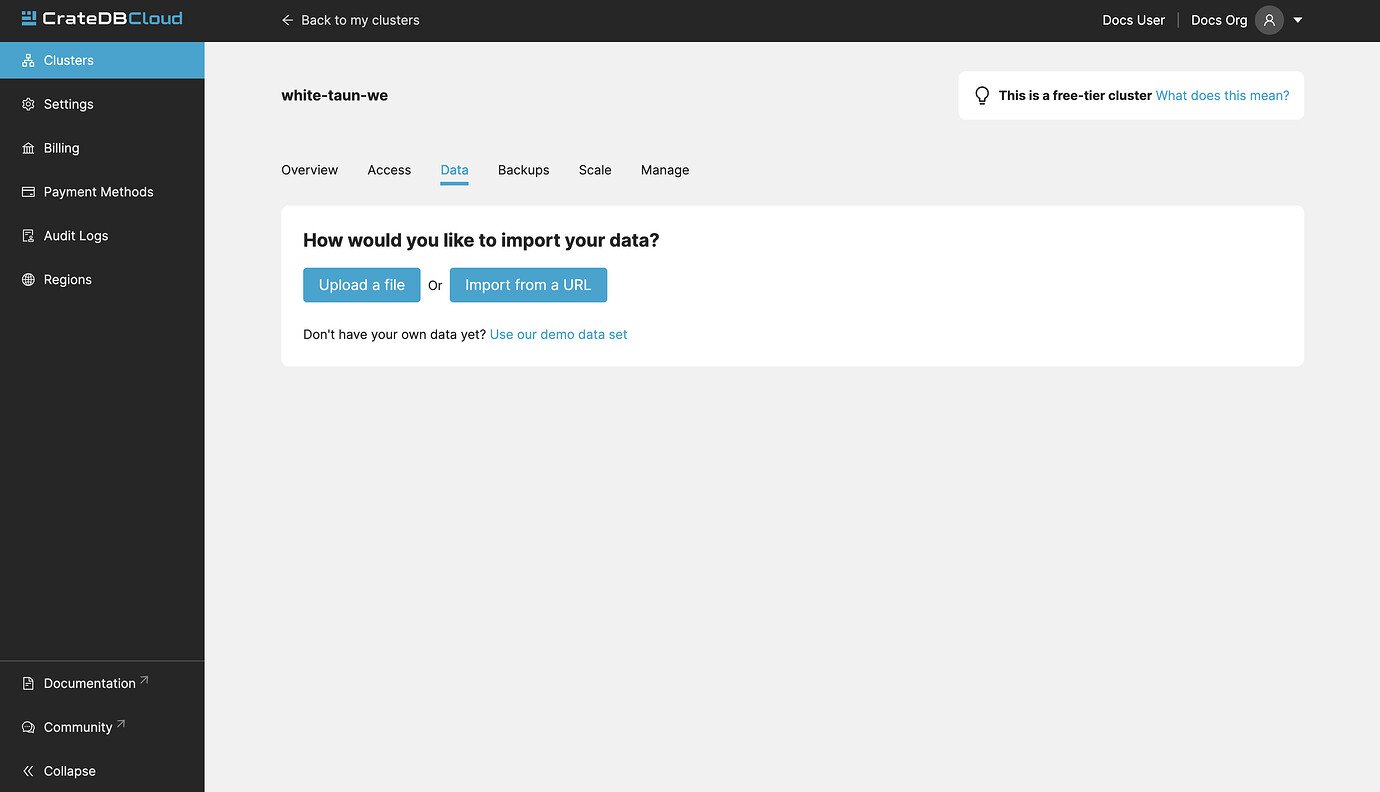
Here you can choose between the Import from URL and Import from file. To import from a URL, click the Import from a URL button:
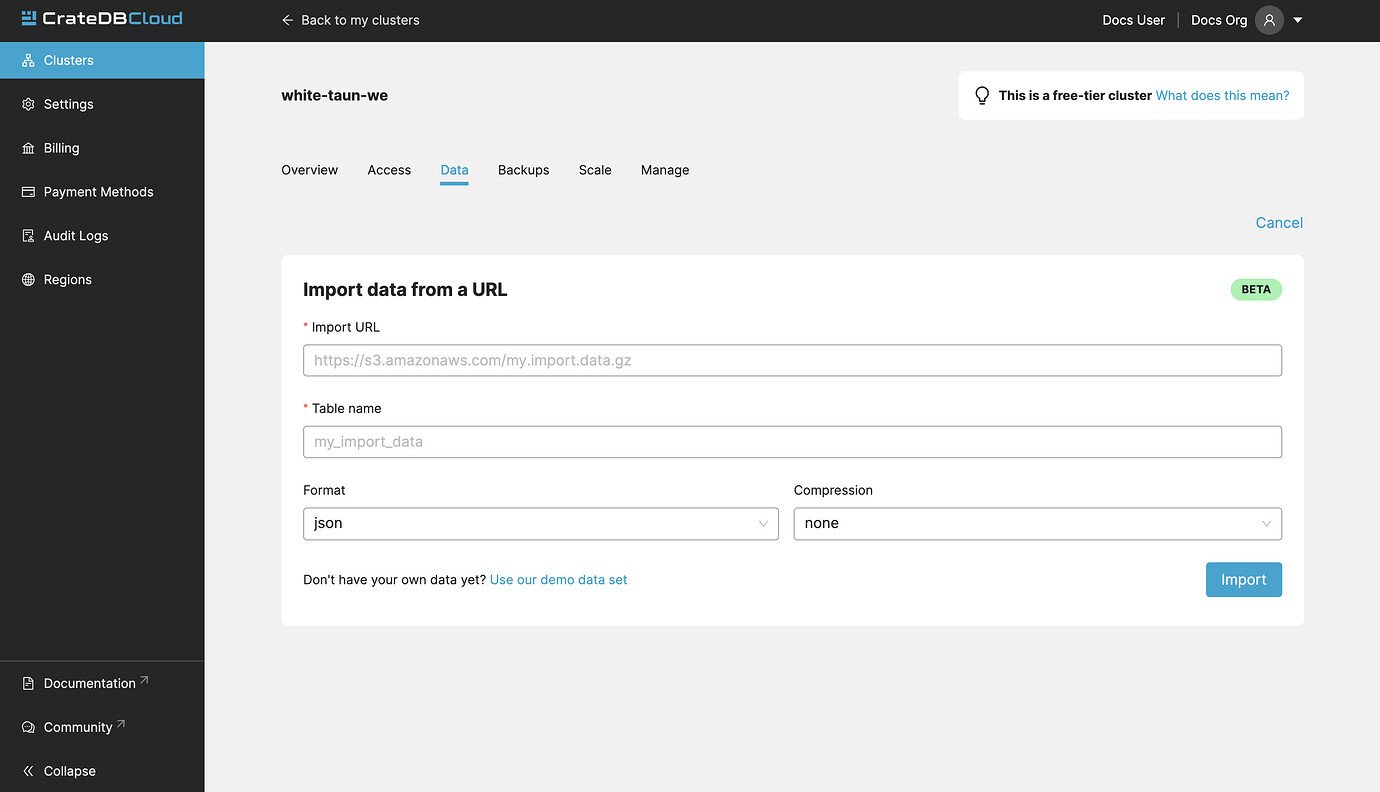
To import data, fill out the URL, name of the table which will be created and populated with your data, data format, and whether it is compressed.
If a table with the chosen name doesn’t exist, it will be automatically created. Please note that in this case, the importer will attempt to guess the data types of each column and might do so sub-optimally.
Import from URL supports CSV, JSON, and Parquet files. Gzip compression is also supported.
Import from file
Uploading directly from your computer offers more control over your data. From the security point of view, you don’t have to share the data on the internet just to be able to import it to your cluster. You also have more control over who has access to your data.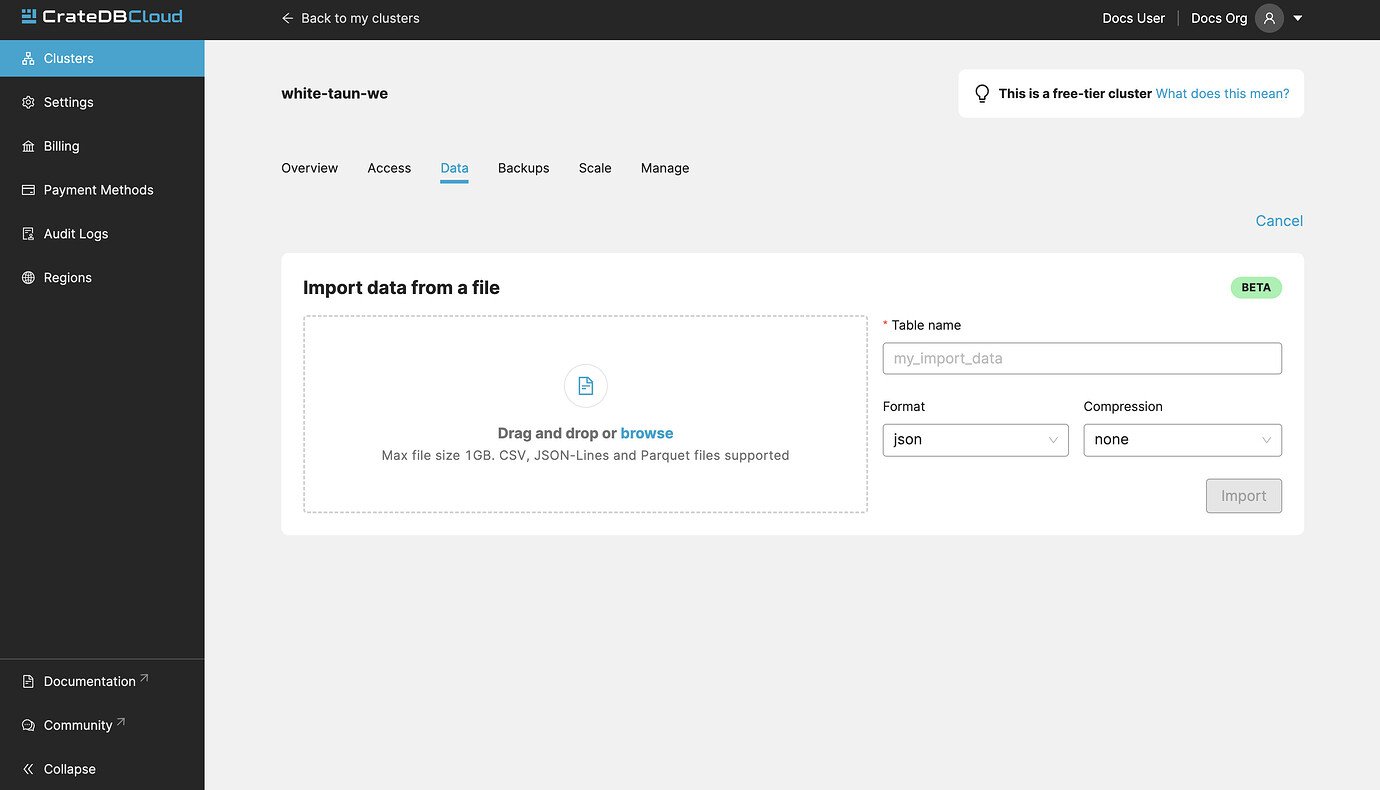
As with the URL import, CSV, JSON, and Parquet files are supported. There is also a limit to file size, currently 1GB.
- CSV files must have a header. Otherwise, the first row will be used as headers.
- For JSON files, only “document-per-line” is supported, as defined in https://jsonlines.org/
- Additionally, for JSON files, each line must be a JSON document (arrays not supported)
Manual import
This is the default way of importing data to your database that uses the COPY FROM statement.
Create a table
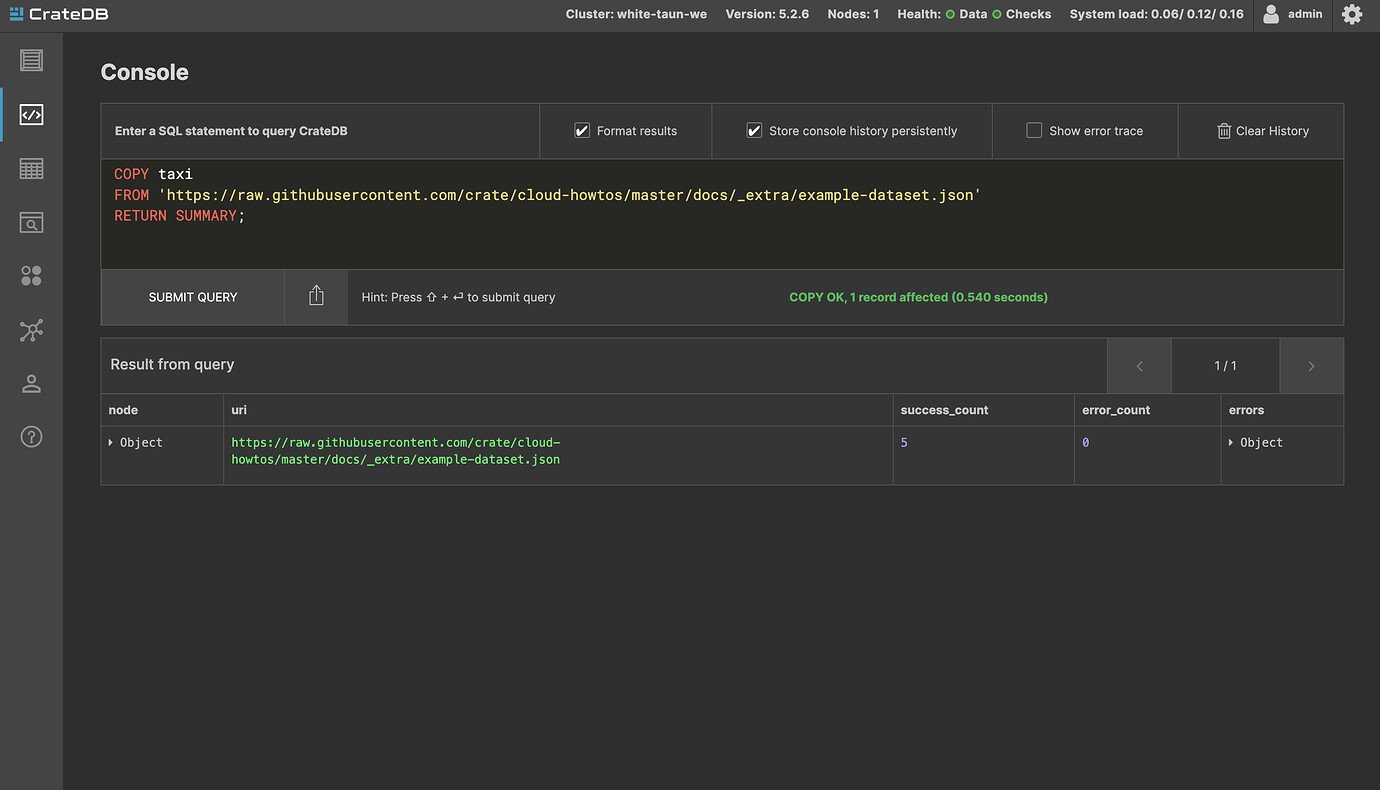
Before you import the data, the table that will be filled with the data must be created. Once logged in to the Admin panel, navigate to the console.
Example statement:
- passenger_count
- pickup_datetime
- trip_distance
- vendor_id
Import data
Now that you created a table, you can fill it with data. In this case, we use a COPY FROM statement. CSV and JSON file formats are accepted when using COPY FROM in CrateDB. In this case, a JSON file is used.
Example statement:
As with the URL import method, your URL must be publicly accessible.
This statement will import a small example dataset hosted in our GitHub repository.
Once submitted, you should get a response like this:
Conclusion
This tutorial shows three methods of importing data to your CrateDB Cloud cluster:
- Import from URL
- Import from file
- Manual import in the Admin UI
We hope it will help you decide which one works best for you.